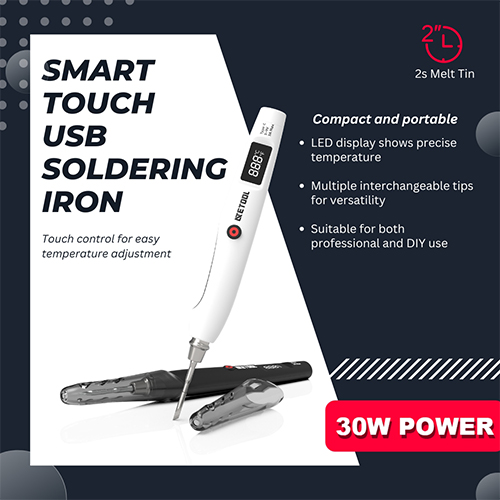
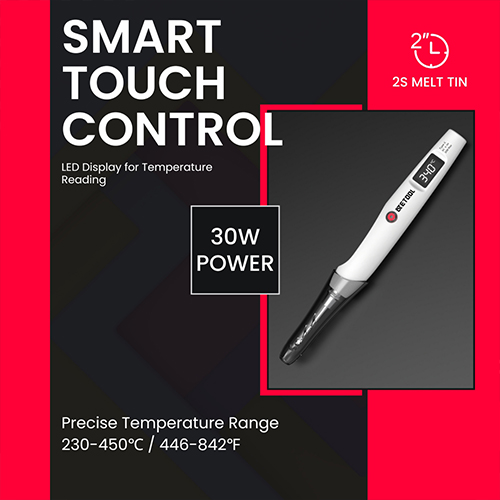
Getting the right soldering iron temp is like finding the sweet spot in your morning coffee – too hot and you scald your tongue, too cold and it’s just not enjoyable. Whether you're a DIY enthusiast, a professional in the electronics industry, or someone in between, nailing the perfect soldering iron temperature can make all the difference in your projects. In this article, we'll dive deep into the world of soldering temperatures, covering everything from the basics to the optimal settings for different applications. Ready to get your soldering iron knowledge to a boiling point? Let’s go!
Soldering iron temperature refers to the heat level at the tip of the soldering iron. It’s measured in degrees Celsius (°C) or Fahrenheit (°F). This temperature is crucial because it determines how well the solder melts and bonds with the components you're working on.
Soldering irons use resistors to generate heat. When electric current flows through the resistor, it heats up, transferring this heat to the soldering iron’s tip. The wattage of the soldering iron affects how quickly and efficiently it heats up. Higher wattage usually means faster heating and better temperature control.
Wattage and temperature go hand in hand. A higher wattage soldering iron can reach higher temperatures and sustain them more consistently, which is great for heavy-duty tasks. On the flip side, lower wattage irons are suitable for delicate tasks like soldering small electronic components, where precision is key.
When working with electronics, precision is critical. For most electronic components and circuit boards, the ideal soldering iron temperature is between 310°C and 380°C. This range ensures that the solder melts quickly without damaging sensitive components. Going too high can fry your circuits, while too low might result in poor connections. Imagine trying to cook a perfect steak – you need just the right amount of heat to get that perfect sear without burning it to a crisp.
Printed Circuit Boards (PCBs) come in two main types: Through-Hole and Surface Mount Technology (SMT).
This method involves inserting component leads through pre-drilled holes on the PCB. The optimal soldering temperature here is around 310°C to 380°C. This ensures that the solder flows well into the holes and forms solid, reliable joints.
Components are placed directly onto the surface of the PCB. These components are generally more sensitive to heat, so a lower temperature of about 250°C to 270°C is ideal. Think of it like baking delicate pastries – you need a gentle touch to avoid ruining them.
Soldering wires require a bit more heat compared to delicate electronics due to their larger size and higher thermal mass. For most wire soldering, a temperature between 350°C and 400°C works best. This range allows the solder to flow well, ensuring a strong, reliable connection. It’s like using a hot glue gun – you need enough heat to melt the glue, but not so much that it burns everything.
Stained glass projects usually use a solder made of tin and lead, which melts at a lower temperature. Here, a soldering iron temperature of about 360°C to 380°C is perfect. This setting allows you to work efficiently without damaging the glass. Imagine you’re working with a delicate ice sculpture – you need just enough warmth to shape it without causing it to melt.
The type of solder you use significantly affects the required temperature. Lead-based solders melt at lower temperatures (about 183°C), while lead-free solders require higher temperatures (220°C to 245°C). Make sure to choose the correct temperature setting based on your solder type. It’s like choosing the right oven temperature based on whether you’re baking cookies or roasting a turkey.
The shape and material of your soldering iron tip also play a role. Chisel tips, for instance, provide a larger surface area and can transfer heat more efficiently than fine-point tips. Additionally, tips made of materials like copper with iron plating offer better heat conduction. Think of it as using different cooking utensils – a wide spatula distributes heat better than a narrow fork.
The environment you’re working in can impact your soldering iron’s performance. Colder ambient temperatures can cause the iron to lose heat faster, requiring a higher initial setting. Conversely, a warmer environment might allow for lower temperature settings. It’s similar to how you might need to adjust your grill settings depending on whether you’re cooking on a windy, cold day or a calm, warm evening.
One of the most common mistakes in soldering is using an incorrect temperature setting. If your soldering iron is too hot, you risk damaging sensitive components, burning the circuit board, or causing the solder to oxidize too quickly, leading to poor joints. On the flip side, if the temperature is too low, the solder may not melt properly, resulting in cold joints that are weak and unreliable. It's like trying to fry an egg on a stove that's either too hot or too cold – you either burn it or it stays raw.
Tinning the tip of your soldering iron is a crucial step that many beginners overlook. This involves coating the tip with a small amount of solder before and after use. Tinning helps improve heat transfer, prevents oxidation, and extends the life of your soldering iron tip. Without tinning, the tip can become oxidized, leading to poor heat conduction and frustrating soldering experiences. Imagine trying to paint with a dry brush – it just doesn’t work well.
Flux is essential for cleaning and preparing the surfaces to be soldered. It helps remove oxidation and ensures a strong bond between the solder and the components. Ignoring flux can result in weak joints and poor conductivity as the solder won’t adhere properly. Using flux is like using a primer before painting a wall – it ensures the final coat sticks properly and looks good.
Soldering might seem straightforward, but safety is paramount. Always work in a well-ventilated area to avoid inhaling potentially harmful fumes. Use a fume extractor or a small fan to blow the fumes away from your face. Wear safety goggles to protect your eyes from splashes of molten solder. Additionally, keep a soldering iron stand handy to rest your iron safely when not in use. It's like handling a hot glue gun – you need to be careful to avoid burns and fumes.
Taking care of your soldering iron will ensure it lasts longer and performs better. Regular maintenance includes cleaning the tip with a damp sponge or brass wire cleaner to remove oxidation and old solder. Always tin the tip before storing the iron to prevent oxidation. If the tip becomes damaged or excessively worn, replace it to maintain optimal performance. Think of it like maintaining your kitchen knives – regular sharpening and cleaning keep them in top shape.
Preheating the components and the PCB can help achieve better solder joints, especially for larger or more complex assemblies. Preheating ensures that the solder flows more easily and adheres better to the surfaces. This technique is particularly useful when working with multilayer PCBs or components with large thermal masses. Think of it like preheating your oven before baking – it ensures even cooking.
Mastering the correct soldering technique is crucial for creating strong, reliable joints. Here are some key tips:
Cleanliness: Ensure all surfaces are clean and free of oxidation or contaminants.
Proper Tip Contact: Make sure the soldering iron tip has good contact with both the component lead and the PCB pad.
Sufficient Heat Application: Allow the joint to heat up adequately before applying solder, but avoid excessive heating that could damage components.
Controlled Solder Flow: Feed solder into the joint, not onto the iron tip, to ensure it flows properly around the joint.
Using these techniques is like following a recipe closely in cooking – attention to detail results in a perfect dish.
After soldering, it’s essential to inspect your work to ensure the joints are solid and free of defects. Use a magnifying glass or a microscope to check for common issues like cold joints, solder bridges, or incomplete connections. Testing the electrical continuity with a multimeter can also verify that the joints are sound. It’s akin to proofreading a written document – careful inspection catches errors that could cause problems later.
Mastering the optimal soldering iron temperature is a combination of understanding the materials you're working with, the specific requirements of your project, and employing the right techniques. By avoiding common mistakes and applying advanced tips, you can achieve perfect solder joints that ensure the reliability and longevity of your electronic projects. Remember, soldering is both a science and an art – with practice and attention to detail, you'll be able to create strong, dependable connections every time. Happy soldering!
Contact: Mr. Li
Phone: (0086) 138 24254 321
E-mail: atetool@atetool.com.cn
Add: 5F, 1-2# Building, Tongfuyu Industrial Zone, Aiqun Rd, Shiyan Subdistrict, Bao'an, Shenzhen, 518108, China